How to Change Default DNS to Google DNS for Faster Internet

Switching to Google DNS will provide you the extra bandwidth to browse faster over the internet than the default DNS. Therefore, we are going to discuss a method that will help you change your Default DNS to Google DNS for faster internet browsing. Go through the post to know about it.
ime to increase your internet speed by Changing Default DNS to Google DNS. DNS is Domain Name system that first convert your domain name into respective IP and then connects to your ISM to loads pages over the web. By default, this DNS is provided by the ISP and differs with ISP respectively. However, the default DNS provides you the less bandwidth area and your internet speed gets limited over the network. But we have a method by which you can change this default DNS to the Google DNS which will provide you the maximum bandwidth limit and give you better internet speed. So have a look on complete guide discussed below.
How to Change Default DNS to Google DNS for Faster Internet
The method is very simple and you can easily change your default DNS and will get the switch to a high-speed DNS. You will experience better internet browsing and download. Just follow up the steps below to proceed.
Steps To Manually Setup Google DNS In Windows PC
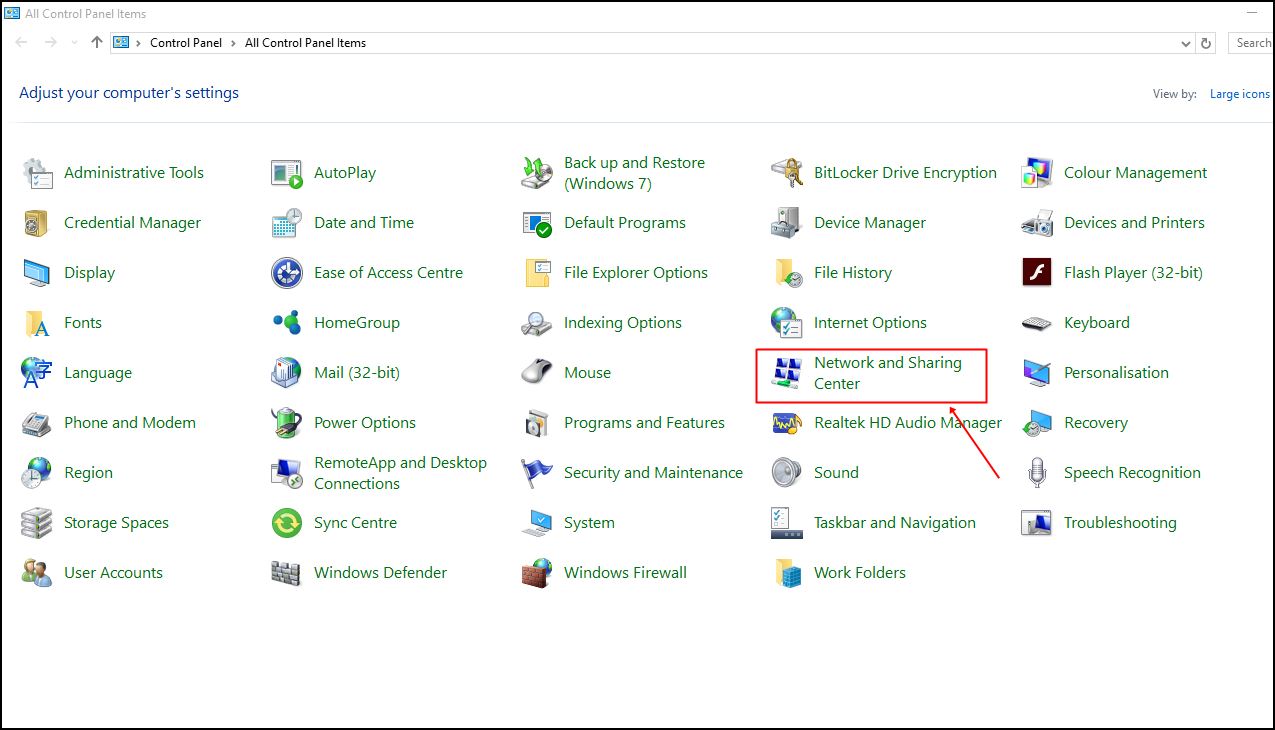
Step 1. First of all, in your windows PC go to the Control Panel and select Network and sharing center
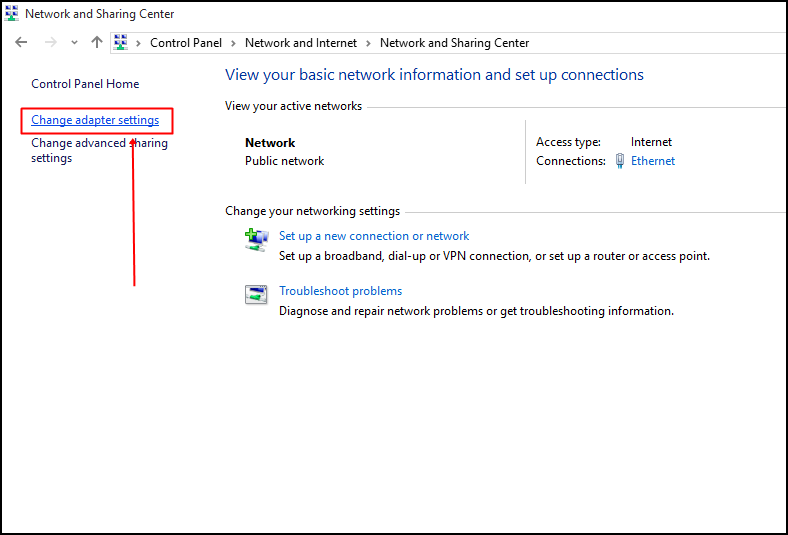
Step 2. And there click on Change adapter settings.
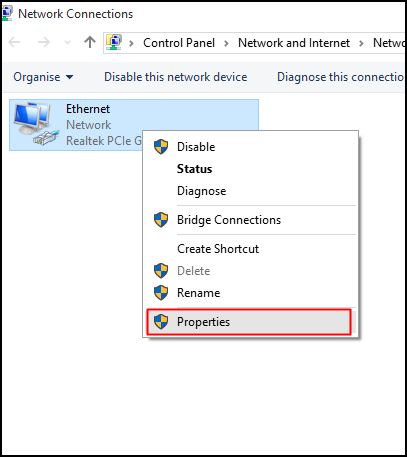
Step 3. Now there you will see all networks, select the network that you want to configure for Google DNS. Now if you want to change ethernet settings then simply right-click onLocal Area Connection and then select Properties.
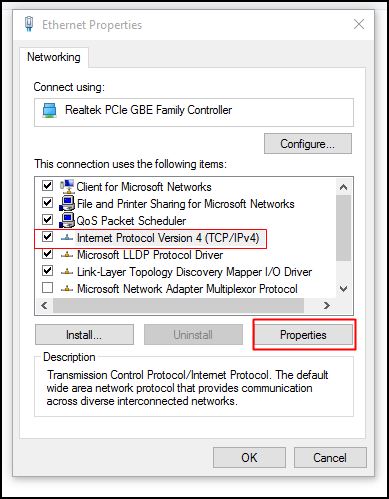
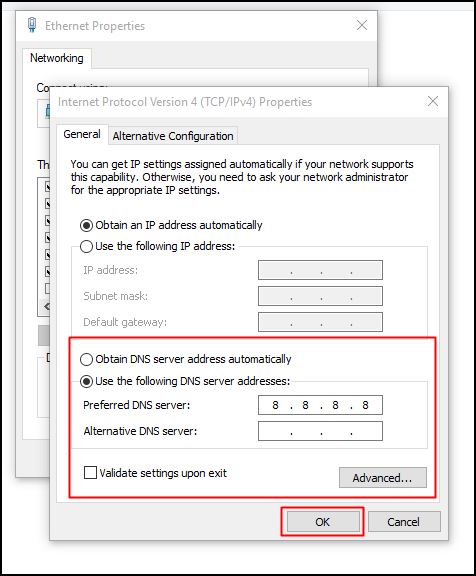
Step 4. Now click on Networking tab and there under This connection uses the following items select the option Internet Protocol Version 4 (TCP/IPv4) and then click on properties.
Step 5. Now choose the radio button Use the following DNS server addresses there and there will be written some default IP, simply clear them. Now there fill the value of google DNS value that is 8.8.8.8 OR 8.8.4.4 and then simply click on “OK” and then restart your network.
That’s it! you are done, now you are switched to google DNS server and observe the change in your internet speed which will be reasonable.
Steps To Automatically Configure Google DNS In Windows PC Using DNS Jumper:
Step 1. Download and install DNS Jumper in your windows PC.

Step 2. Install the tool and launch it and in a tool set the settings as shown in the screenshot below.
That’s it now your DNS will get the change to the google DNS that will provide you extra internet speed.
So above is all about Boost Internet Speed By Changing Default DNS to Google DNS. With this method, you can easily switch to Google DNS and boost the internet speed in your PC. Hope you like this, do share with others too. Leave a comment below if you have any related queries with this.


Post a Comment