How To Capture Animated GIF Screenshots In Windows
As we all know, recording live screen display can pay lots of load on our computer storage. Therefore, we are going to share an easy method that will help you capture screenshots in the form of animated GIF. Go through the post to know about it.
here are lots of tools available today for screen recording and screen capturing that records the live screen display but all these apps generate a very bulk sized files of screen recordings. And this can pay a load on your computer storage. Therefore, here we have the alternative for it that is capturing the screenshots in the form of animated GIF and with that, you can see the live effects of the things performing on your windows PC. This can be done very easily with the app that we will be discussing here. So follow up the complete guide discussed below to proceed.
How To Capture Animated GIF Screenshots In Windows PC
This method depends on some of the best tools by which you can combine up screenshots to make an animated GIF which will be of the very less size. So have a look at these tools discussed below.
Also Read: How to Lock Specific Apps in Windows 10
#1 Gyazo
This is one of the best tools that will allow you to capture the screen in gif format. The best part is by using this tool, you can easily capture the screen of a particular rectangular area. Follow the below steps to use this tool.
Step 1. First of all download and install Gyazo tool in your windows PC. Now after installing app, click on the icon in the taskbar. Now there you have to select Capture gif or you can also use shortcut keys for this that is ctrl+shift+g.
Step 2.Now a rectangular box will appear in which you have to select the area that you want to record, simply set it according to your wish.
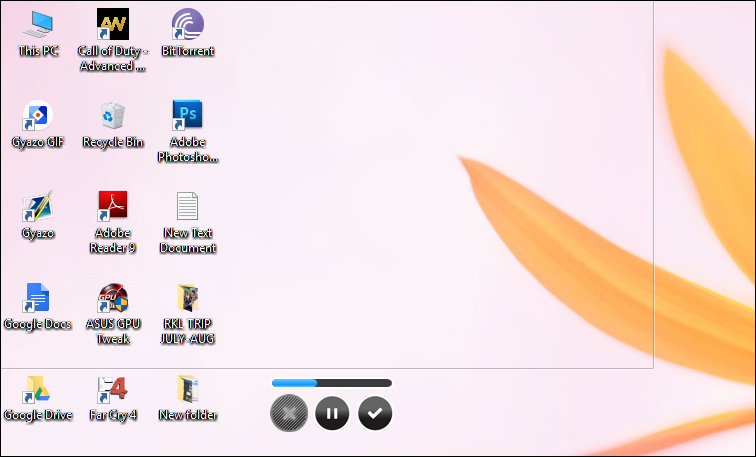
That’s it! you are done, now the capturing will start and when the screenshot is captured it will get automatically uploaded to their server and will give you the link to your animated gif that you can easily use anywhere.
Download Gyazo For Windows
#2 ScreenToGIF
This is the another best tool having similar working like above tool. This tool allows you to record a selected area of your screen and save it as a Gif. By using this tool, you can easily record your screen and save directly to a GIF animation. Here’s how to use ScreenToGIF
Step 1. Download ScreenToGIF and install it. After installing it now open select “recorder”
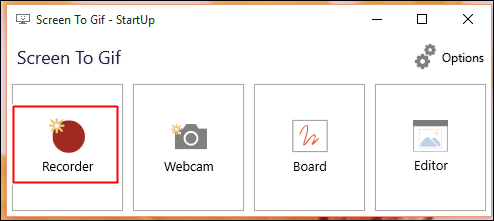
Step 2. Now you will see a window with a transparent body as shown below. Now you need to click on “Record” and then record it by simply moving it according to your wish and then click on stop.
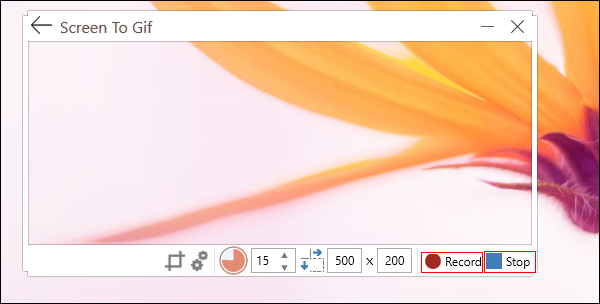
Step 3. Now you will see screen to GIF editor pops up in your windows screen and you can edit your GIF according to your wish and need to click on “Save As” to save on your computer

Download:- ScreenToGif for Windows
#3 LICEcap
LICEcap can capture an area of your desktop and save it directly to GIF. LICEcap is an intuitive but flexible application (for Windows and now OSX), that is designed to be lightweight and function with high performance. Here’s how to use LICEcap.
Step 1. First of all, download and install LICEcap on your windows PC and run it.
Step 2. Now you will see a window with a transparent body as shown below. You need to click on “Record” in order to record the screen
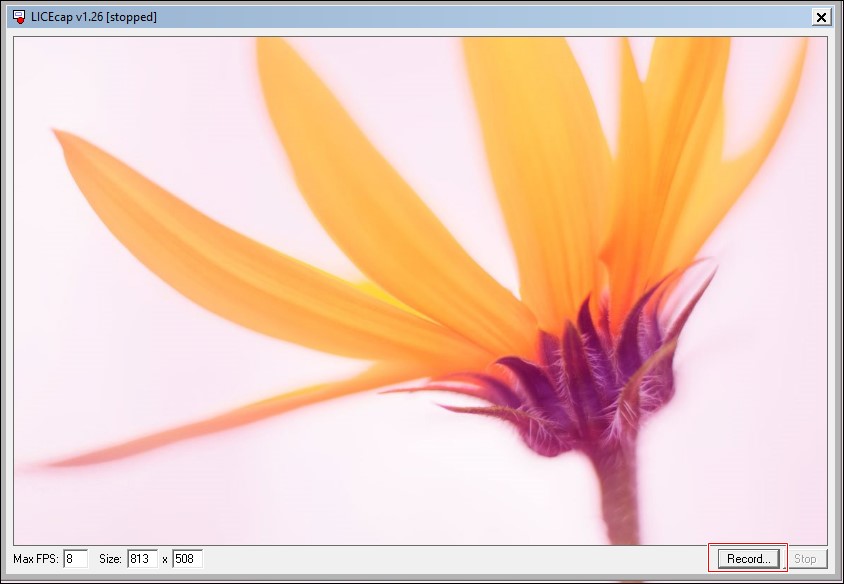
Step 3. Now you will be asked to select where the GIF you would like to save. Simply, select the folder and click on “Save”
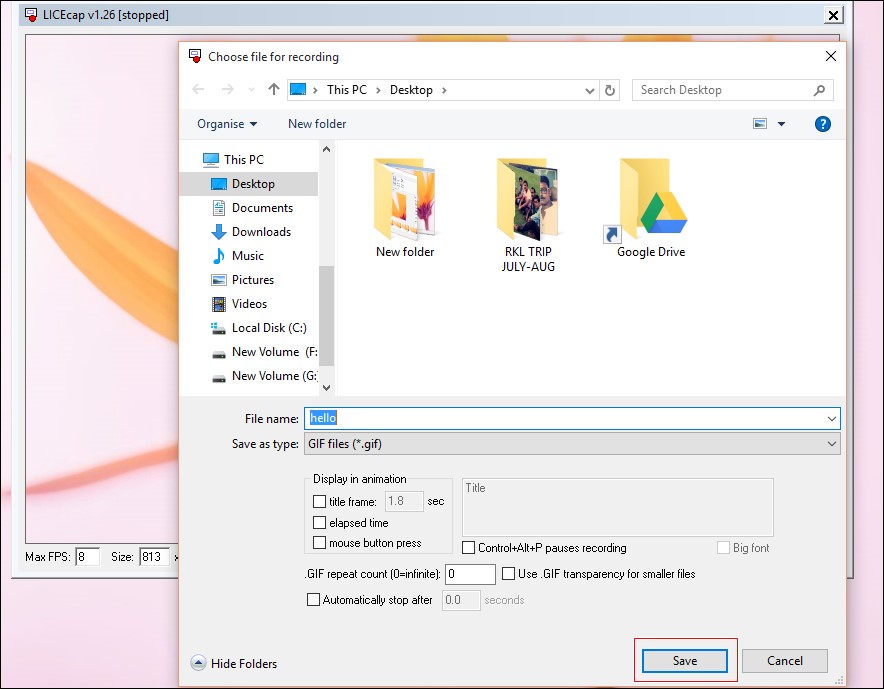
Step 4. Now you will see LICEcap transparent windows will start recording, you can pause the recording too. In order to complete the recordings, you need to click on “Stop” button.

You can have a look at your created GIF in your destination folder.
Download LICEcap for Windows
So above is all about How To Capture Animated GIF Screenshots In Windows. With these tools, you can easily make you desired animated GIF in your windows. Hope you like this cool method, keep on sharing with others. Leave a comment below if you have any related queries with this.


![4K Video Downloader 4.0.0.2016 Cracked Full Version [Latest]](https://blogger.googleusercontent.com/img/b/R29vZ2xl/AVvXsEibkBM9H3EnNYaE5zSqVnCgYSR787ZLlDLasK39cQvwhoKnFWQGupuLghGG5yNirr_-t0_pBJeDrjfscYQipi2PRoqgjN0mlmrdAmSBnFMOEp6e4mHxYyYRZ9aGALUdSLx6IpuzmvUw58o/s72-c/4k-Video-Downloader-2015.jpg)


Post a Comment